One of the most useful tools for an amateur electronics is a power supply with a variable output voltage, since obviously all subsequent projects need energy, and batteries are a good alternative. Buy
a source of these features would be very expensive, around 150 euros and get a 24V 10A transformer as shown in most tutorials Internet, it is not cheap. We therefore opted to use an ATX source, which can achieve any old computer repair shops or points of our city clean, free of charge.
For this show we need the following components:
(click on them for more information)
3 2N3055 transistor
3 0.5 ohm resistors at least 6W
Lm 317
10k potentiometer + bezel.
270 ohm resistor capacitor 10 uF
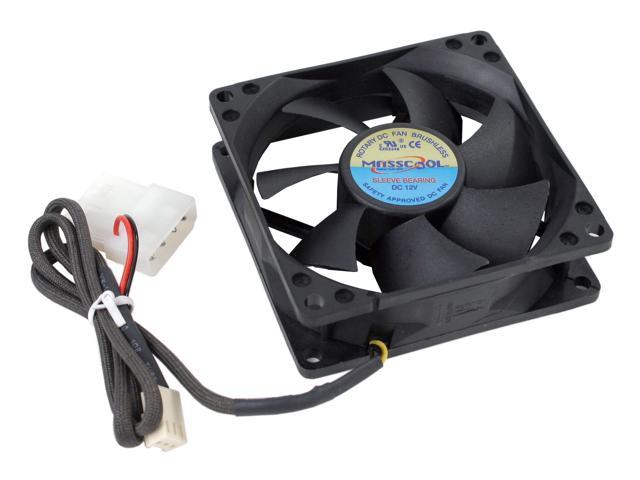
Box 40V 12V fan
4 terminal 4 terminal red black
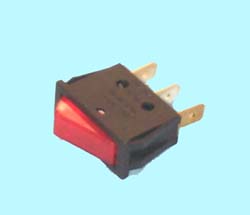
Switch
12v voltmeter panel radiators
transistors and integrated.
panel Fuse + Fuse 2 A
Fasteners and thermal paste.
First of all I will give some recommendations to avoid problems that can find you:
- The box should be large enough to accommodate ATX plate, control circuit, fans and all the wiring.
- Remember you are dealing with working on 220V circuits, be careful when making connections and isolate all very well and never work under stress. Prepare
- bits and crowns of several steps to make the holes for the panel components.
- can add anything you want, such as a voltmeter more departures from the source, etc.

can mount it as I have, on a plate of "islands" are placed the regulator, the resistor 270 and condenser because the transistors are placed on the radiators and the heating can place next to them.
start with the removal of the source ATX, for we must not find many difficulties, yet if we have a box large enough supply, we can leave even with all the metal casing.
To operate a source ATX out of a computer, we must attach the green wire black one, we do this by welding to each other and using "case termorretactil " . This is what we do when we turn the switch on the 22 ov the source work.

Now, we mounted all the components in the front and back:


As you can see I have placed the transistors out of the box with radiators, the main reason is because,,, did not fit into the box, but also a good option to improve their refigeración , remember to place the radiators using toothpaste témica.En can see the front panel mounted voltmeter, terminals The with a trim potentiometer and switch bright.
Once we complete panels, the source bridged and control circuit mounted, proceed to mount everything inside the box.
see that the power cable is more than we need, we leave and the others needed desoldering we can "reserve" a cd connector without cutting through if we make any extension in the other source posteriormente.Los connectors also cut them, do not need. Remember
to 12V input circuit of the cables from the power supply for atx sources the yellow wire is the 12v cable, here is a description voltages corresponding to voltages:

For fixed output terminals just put a connector cable attached to the required voltage and its negative side (remember that all the black wires to the same place, it does not matter which you use). 12 is yellow, red is 5V,-12V is blue, 3.3-5v is orange and white.
I used a 220v light switch, which cuts the voltage directly.
2 A fuse was placed in the output variable.
If you want to increase the current in the output variable can do this by putting more transistors, note that all transistors are set equal, you'd just add it with the corresponding resistencia.Si decide to do this also points up the power of resistance to at least 10W.
Once all the cables together is something like

We set then screw the plates to the bottom of the box and we are gradually putting the wiring and set the front and rear.
Remember to put a fan somewhere in the box with a good outlet for this I used a crown size fan and fan cover an old grill. Before closing
reviews all good, all this good soldier, that the cables are properly connected and that nothing rubs on the fan and radiator.
Close the case and,, to me has been something like this:
 In this picture we see the back of the box and fan detail at the top, remember that it is very important to place the fan to be able to get all the hot air from the box.
  And this is the finished front!
 as you can see I have placed
exits 12 and-12V, 5 and output variable, but as I said you can put as many as different strains have the power (-5, 3.3 ...).
variable output voltage ranges from 0.5 is a 11V (transistors and resistors cause a small voltage drop)
can label the cover doing a cover drawn by computer or simply exits
This source with a source-only 200W ATX is able to provide 9 Amps in the output of 12volts, 16 amps in the output of 5 volts, 500 mA in the output of-12V and up to 2 Amps
on output variable, the latter limited by a fuse.
0 comments:
Post a Comment